Sunday, August 29, 2010

Flourless Chocolate Cake

Who said a cake has to have flour? Not me! I brought home this recipe for Flourless Chocolate Cake last September from a cooking class I attended in Grand Haven at the Artisan Cooking School. For obvious reasons I couldn't wait to take the class (titled "Chocolate"), and I would be glad to pay to go to the very same class again. On the menu for the evening were Chocolate Souffle, Warm Chocolate Volcano Cake, Chocolate Ganache, Chocolate Covered Strawberries, Flourless Chocolate Cake, Creme Anglaise, and Chocolate Mousse. See? You're jealous you weren't there, and you should be. The cooking class participants received GENEROUS samples of each recipe featured during the class. I had to get a "to-go" box by the second or third sample. And then I had plenty of dessert for myself and my husband the next day. Wow.

Almost a year later I am finally getting around to making the recipes myself. This is the first recipe that I have tried from that class. It was incredibly easy and sinful to eat. The end product is a very smooth, dense cake. My husband thought it's texture was similar to a brownie. I can see where he's coming from, but the texture is much classier and more refined than a brownie. It's not chewy in any way. A brownie says, "Serve me up at a BBQ next to some fried chicken." This flourless chocolate cake, which is not nearly as sweet as a brownie, says, "Cover me with raspberry coulis (raspberry sauce) and make designs on the plate like you're a big time chef!"

In addition to being decadent, this recipe is super simple. It took maybe 15 minutes of prep time (which included a bit of a search for the cake pan), and then about 25 minutes of cook time. Yay!

FLOURLESS CHOCOLATE CAKE

Makes one 8-inch cake.

4 oz. fine-quality bittersweet chocolate (not unsweetened)
1 stick (1/2 cup) unsalted butter
3/4 cup sugar
3 large eggs
1/2 cup unsweetened cocoa powder plus additional for sprinkling


Preheat the oven to 375 degrees. Spray bottom of 8-inch round baking pan with non-stick cooking spray. Line bottom with a round of parchment paper. Spray paper again.
***
Chop chocolate into small pieces. In a double boiler (or metal bowl set over saucepan of barely simmering water), melt chocolate with butter, stirring until smooth. Remove bowl of chocolate from heat and whisk sugar into chocolate mixture. Add eggs and whisk well. Sift 1/2 cup cocoa powder over chocolate mixture and whisk until just combined. Pour batter into pan and bake in the middle of oven for 25 minutes or until top has formed a thin crust. Cool cake in pan on a rack 5 minutes, then invert onto a serving plate.
***
Dust cake with additional cocoa powder and serve. Cake keeps, after being cooled completely, in an airtight container for 1 week.

Some notes:


  • I used Ghiradelli bittersweet baking chocolate and Penzey's "dutch process" cocoa.

  • If you have a microwave with a "soften/melt" setting, you're in luck. I programmed mine for melting chocolate, stirred a few times and POOF! no need for a double-boiler!

  • I thought I was going to have to "temper" the eggs, so I wouldn't end up with a scrambled mess, but I was surprised that the chocolate melted, but still felt cool to the touch. If your chocolate/butter mixture feels more than lukewarm, be careful when adding the eggs, or wait a bit if you don't know the tempering process.

  • I only own 9-inch cake pans, so I watched the cake closely and ended up removing it from the oven with about six minutes left on the timer (I had set it at 25 minutes).
Thursday, August 26, 2010

Blue Cheese Dip


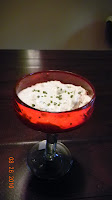
I am a huge blue cheese fan, so when I came across this recipe in the Food Network Magazine, I couldn't wait to try it. The magazine suggests serving the dip with vegetable chips (also known as root chips). One of my favorite restaurants serves a very tasty appetizer called "Root Chips" --vegetable chips made from beets, sweet potatoes, radishes, etc--with a hot chevre dip. So I already knew I would like the combination.

While the Food Network Magazine gives the recipe for making the chips, I prefer to go the easier route and just purchase root chips at my local supermarket. If you can't find them in the chip aisle, try the specialty foods or organic section.


BLUE-CHEESE DIP
Food Network Magazine, (not sure what month) 2010

1/2 cup heavy cream
1 8 oz. container sour cream
2 tablespoons fresh lemon juice
4 oz. blue cheese, crumbled
2 scallions, finely chopped
1/2 teaspoon garlic powder
Kosher salt and freshly ground pepper


Blend the heavy cream in a blender until slightly thickened (I used a hand-mixer because it's easier to clean up). Add all the remaining ingredients except the salt and pepper. Pulse to combine (or beat on low speed with your hand-mixer). Season with salt and pepper.

A bit of advice: Always add salt and pepper in small amounts and taste as you go. You can always add, but never take back. The one thing that I would advise is that your freshly ground pepper is FINELY ground. I came across some larger pieces of pepper while eating the dip and they really bit my tongue.

A couple more notes: I didn't have scallions, so I used Penzey's Chives. This dip could be served in other ways: a topping to a grilled steak, blue cheese dressing for a wedge of lettuce, vegetable dip, baked potato topping, buffalo chicken wing dip, etc. You get the picture.

Yum.

Fruit Pizza


An easy and beautiful dessert to bring to any party that takes place during the berry season--4th of July, for example!
FRUIT PIZZA
Crust:
1 package sugar cookie mix -- prepare as directed, but shape dough into disc and roll out into one giant circular cookie about 1/4 inch thick. I use my pizza stone as a guide (here I have parchment paper under the cookie so that it is easy to serve) for size. Watch carefully during baking. When edges look golden brown and middle looks set, it's probably time to remove and cool completely.
Topping:
2 8 oz. packages cream cheese (I use the 1/3 less fat Neufchatel)
1 cup powdered sugar
1-2 teaspoons vanilla extract
Cream together and spread over the COMPLETELY cooled cookie. You may have some topping left over. Use it as fruit dip over the next few days.
Fruit: Any that you like!
The pizza above has strawberries, raspberries and blueberries. I slice the strawberries with an egg-slicer to get same-thickness pieces, then I try to choose the same-sized pieces to make the design. Left over slices can be used to top strawberry shortcake or ice cream over the next few days. Leave the raspberries and blueberries whole and experiment with your design!

Pesto


Mmmmmmmmm classic pesto. I stocked up on some basil at the farmers market today so that I could make this recipe. Just so happens I picked up this recipe at one of the vendors earlier this summer.


***


BASIL PESTO


From the Earthkeeper Farm stand (and they credit Simply in Season)


***


1 cup packed fresh basil


1-3 cloves garlic (I always go big on the garlic)


1/3 cup pine nuts or walnuts


3-6 tablespoons of grated parmesan cheese


2 sprigs parsley


1/3 - 1/2 cup olive oil


***


Blend in food processor until smooth. Use immediately or refrigerate.


Tip: Freeze leftover pesto in ice cube trays. Store cubes in ziplock bag in the freezer and you can have fresh pesto all summer long.


***


The first time I made this recipe, I didn't have any parsley on hand. No big deal--not a necessity to make good pesto. It still tasted excellent. Here are 10 things you could do with a simple batch of pesto:


1. Mix with freshly cooked hot pasta. Eat immediately!


**


2. Spread on inside of bread (touching the cheese) to make Italian grilled cheese. Use a nice white melting cheese like mozzarella, fontina, or provolone as your cheese.


**


3. Mix with cold cooked pasta for a pesto pasta salad. Add some diced tomatoes, peppers, hard salami or pepperoni (whatever you normally put in a pasta salad).


**


4. Use as your sauce for making pizza instead of (or layered with) the red or white sauce you normally use. Especially delicious when making a chicken/alfredo/spinach pizza.


**


5. Jacked-up bruschetta: spread some pesto on small slices of crusty bread, top with ricotta, then add diced tomatoes that have been swimming in balsalmic vinegar for a while.


**


6. Stir into cooked rice for a burst of flavor to an otherwise bland starch.


**


7. Marinade: My husband marinated some chicken breasts in left over pesto, then grilled them.


After grilling the first side, he added a couple more tablespoons to the top of each piece. Holy cow--some of the best grilled chicken I've ever had. It would be fabulous on fish or shrimp, too!


**


8. Soup: Add a tablespoon to a bowl of tomato soup in the winter? Yum.


**


9. Alfredo sauce: For a twist on your normal alfredo sauce (either jarred) or homemade, add some pesto. Remember to go slowly and taste often. You can always add more, but you can't take it back!


**


10. Go Dr. Seuss: Make some green eggs and ham. Add a bit of pesto to your uncooked eggs before you scramble, or garnish your Italian omelet.


Southwestern Breakfast Casserole


If you are a fan of breakfast casseroles (which I am) and a fan of Southwest flavors (which I am), you'll probably like this recipe (which I do!). A typical breakfast casserole usually contains eggs, bread, milk, some sort of breakfast meat (ham, sausage, bacon) and cheese. This is another variation, but more unique than any other variation I've ever cooked. It clearly has that Southwestern-y, Tex-Mex flavor . The corn muffin component is reminiscent of the flavor of corn tortillas in the casserole, and cumin would be the flavor that comes to mind when you think of tacos, chili, or enchiladas. The Rotel and hot sausage add quite a kick. Not so spicy or hot that I was uncomfortable, but definitely present. Some people I know would prefer it more mild (in which case you should use plain diced tomatoes and mild sausage), and some people I know would prefer it even hotter (dice up a jalapeno pepper and add it to the mix). I would probably give this a "medium" rating. A nice dollop of sour cream, or even more gourmet: cilantro-sour cream, would finish a serving off nicely, adding yet another component of Southwestern flavor, while helping to temper some of the heat.


SOUTHWESTERN BREAKFAST CASSEROLE

Cooking Light (December 2000)


1 8 oz. package corn muffin mix
3 cups cubed white bread
8 oz. hot turkey Italian sausage*
1 c. chopped onion
2 1/2 c. fat-free milk
1 teaspoon ground cumin
1/8 teaspoon black pepper
1 (10 oz) can diced tomatoes and green chiles (such as Rotel), undrained
1 (8 oz) carton egg substitute**
Cooking spray
1 cup (4 oz.) reduced-fat shredded Monterey Jack or cheddar cheese***

*I used 1 lb bulk hot italian pork sausage
**I filled a measuring cup up with real eggs to the 8 oz. mark, then whisked them a little with a fork.
***I used 2 cups cheese and it was NOT reduced fat (I grated an 8 oz. block of MJ cheese and used it all!)


1. Prepare corn muffin mix according to package directions. Cool. Crumble muffins into a large bowl; stir in cubed bread. Set aside.
2. Remove casings from sausage (unless you bought bulk). Cook sausage and onion over medium heat until browned, stirring to crumble. Drain.
3. Combine milk, cumin, pepper, tomatoes, and egg substitute (or eggs); stir with whisk until well blended. Add sausage mixture and 1 cup of the cheese; stir well.
4. Spread into a 9x13 pan. Cover and refrigerate 8 hours or overnight.
5. Preheat oven to 350 degrees.
6. Bake casserole for 20 minutes. Add remaining cup of shredded cheese to top. Bake an additional 20 minutes or until set. Let stand 10 minutes before serving.

YIELD: 8 servings

Obviously since this recipe comes from Cooking Light, the whole point of the turkey sausage, egg substitute and lower portion of cheese is to reduce fat and calories. The whole point of me making the recipe was to try a really different variation of the breakfast casseroles I like so much. If you make CL's version, each serving contains only 271 calories (25% of which are from fat). If you make my version...well, maybe you should just eat half as much!

Tuesday, August 17, 2010

Sour Cream Enchiladas

I thought that I couldn't make enchiladas that remotely represented the ones served in authentic Mexican restaurants. But I can, thanks to this recipe and the fact that I will go to my grave using corn tortillas, no matter how much they flake and fall apart. These enchiladas, from one of Penzey's recipe cards that are free to take from their store, get as close as I've ever gotten to authentic taste.

SOUR CREAM ENCHILADAS

1 1/4 lbs. lean ground beef
1 c. sour cream, regular or light
1/2 c. chopped onion (1 small)
1 c. shredded cheddar cheese, divided
1 4 oz. can chopped green chiles
1/2 tsp. ground cumin
1/2 tsp. coarse ground black pepper
1 tsp. salt
1 tsp. Chili Con Carne seasoning or chili powder
12 corn tortillas
1 10 oz. can red enchilada sauce
Vegetable oil for frying

Preheat oven to 350 degrees. Brown the ground beef. Remove from heat and drain any fat. Add to the beef the sour cream, onions, 1/2 cup of the cheese, the green chiles and seasonings. Mix well and set aside. Fill a deep skillet with oil, about 2" deep, roughly 2 cups. Heat the oil over medium-high heat. Dip each tortilla, one at a time, into the oil and cook until softened, 1-2 minutes. Then dip each fried tortilla into the enchilada sauce. Spoon 2-3 TB of meat mixture down center of each tortilla, roll, and place in an ungreased glass baking dish. Pour the remaining enchilada sauce over the tortillas and top with the remaining cheese. Bake at 350 degrees for 35 minutes.

Sabrosas. (Delicious.)

Now, let's talk for a second...or I guess let ME type for a few more seconds. Here are some tips if you're making these for the first time:

1. Season everything to taste. Since the meat mixture is cooked, this is a great opportunity to make it taste exactly the way you want it. If you like onions or cheese, add a little more. If not, add less. I'm not a big green chile fan, so I don't go out my way to buy them for this recipe. Not a big deal. I didn't have Penzey's "Chili Con Carne" seasoning, but I did have their "Chili 9000" and it worked perfectly. The cumin is very important. I'm sure I use more like 1 - 2 teaspoons, instead of 1/2 tsp.

2. The one thing I would NOT recommend would be to use a package of orange taco seasoning.

3. Working with corn tortillas can be frustrating. They are dry unless you heat them, and even then they tend to break apart. I noticed that if my oil wasn't hot enough, the tortillas would break up in my tongs when I tried to remove them. The idea of dunking tortillas into a pool of oil didn't really sit well with me, so I just drizzled my pan with oil and added more as needed.

4. Make yourself a little assembly line. If you're flying solo, you'll need to heat tortilla, remove onto paper towel lined plate for a second, dip in enchilada sauce, fill, roll, and place in pan. Then start all over.

5. Since corn tortillas usually come in big packs of 30, it might be wise to double up the meat recipe and freeze some or give away to someone you really like.

6. Have more enchilada sauce and cheese on hand. Maybe you won't need to open it after all, but it's nice to have plenty and be able to cover your whole dish, especially if your husband likes extra sauce and cheese like mine does.

OK--es la hora de cocinar! (Time to cook!)

Summer in a Glass


I can't take credit for that title, but it sure does fit this recipe. "Summer in a glass" is the title to a recipe I found and saved from Cooking Light, August 2008. So I've had it for two years and haven't tried until today. Silly, silly me. (Or busy, busy me, perhaps.) In any case, I'm glad I made it today. No need to EVER drink powdered or from-concentrate lemonade again. This was pure heaven. The suggested variation sounds like more heaven. I will not wait two years to try those out!


BASIC LEMONADE


Make a simple syrup: Combine 1 cup sugar and 1 cup water in a medium saucepan. Bring mixture to a boil for 1 minute or until sugar dissolves. Remove from heat, pour into a glass pitcher, and transfer to the refrigerator to cool completely. (This mixture may be stored in an airtight container in the refrigerator for up to two weeks.)


Squeeze lemons: Juice lemons until you yield about 1 1/2 cups -- about 11 medium lemons. I did not use any special equipment. I don't even own a hand-juicer. I just rolled each lemon on the counter with my hand a few times (while gently pressing down) to release the juices. Then I cut in half and squeezed them by hand until I got 1 1/2 cups of juice. I don't know if it was EXACTLY 11 lemons, but it was probably close.


Combine and serve: Pour the lemons juice into the pitcher with the simple syrup, along with 3 1/2 cups of cold water and 2 cups of ice; stir. Garnish with thin slices of lemon, then serve. Yield: about 8 cups.


Variation: Instead of using all 1 1/2 cups of lemon juice, use 3/4 cup lemon juice and 3/4 cup pureed and strained berries--like strawberries, raspberries, blueberries...the possibilities are endless!


Friday, August 6, 2010

Where Has Six Months Gone?


*sigh* My infant has turned into a baby, and toddler is right around the corner.

Brayden has been a joy getting to know. We were lucky to spend many, many quality days and weeks together, as I only returned to work part-time for a few weeks before summer break gave us three more solid months together. Since February 7th, Brayden and I have been virtually inseparable.

From day one, Brayden has been a hold-me baby. He loves nothing more than to be in someone's arms. Although it can get annoying if I am trying to accomplish something around the house, and it is taking four times as long because I'm doing it with a baby in one arm, I still realize the beauty of having a little one in my arms, and know that sadly, there will come a day when he wants to be running around like a madman rather than cuddling with Mommy.

I am so excited that Brayden has nursed exclusively for the past six months. When I look back on what an accomplishment that is, especially in our culture, I am very proud of myself. Not many mamas out there in our country are willing to sacrifice their freedom to be their child's one-and-only food source. I hear a multitude of excuses for why some of my friends or family members haven't tried nursing or who tried it and quit. I don't judge them--we must all do what is best for ourselves, I guess. I mostly feel sad for the baby and mom who don't get to nurse. Sad to know that a baby missed out on the best possible nutrition and bonding because his/her mom didn't "feel like it." Sad for the mom who thought it took too long, instead of enjoying every single rare moment of getting to hold a nursing baby close to her heart. There have certainly been times of self-doubt and frustration for me. Is Brayden fussing because he's still hungry? Why does he need to change sides so often? Why is my letdown so slow? When can I have a whole day to myself again to go shopping? When will I get a full night of sleep? Because I educated myself through books and breastfeeding group, I know that fussiness usually does NOT have to do with milk supply--unless Brayden is going through a growth spurt. Then the constant need for nursing is only Brayden's body telling my body to make more milk. Oh yeah. I can do this. When can I have a whole day to myself? Someday. But someday can wait because holding this precious baby who stops nursing for a second to smile at me and grab at my hair is so much more satisfying than getting a day to myself. I'll have plenty of those when he's old enough to go fishing with Daddy. When will I have a full night of sleep? Well, we're already down to one feeding in the middle of the night. Brayden is way ahead of the curve that Drew was on. We're sleeping well. And if I have to get up in the middle of the night to hold my baby close, I usually feel blessed.

Brayden is known for being a pretty sweet baby. He hasn't been too much of a cry-for-no-reason baby. Just recently, because he's been teething, have I noticed extra fussiness.

This summer has been especially hot and humid, considering we live in Michigan. Following last summer when there were only TWO days the ENTIRE summer above 90 degrees, I have felt as if it has been exceptionally hot, but the news people say it's been somewhat average. Brayden and I have not spent too much time outdoors because of the heat and humidity. He did go swimming during 4th of July weekend in Aunt Beth's pool, and just recently in my friend Amy's mom's pool. He seems to enjoy the water. He most certainly enjoys bathtime and the much cooler temperature of the pools didn't phase him at all.

So as the summer draws to a close and going back to work is on the horizon, I am feeling particularly melancholy.